8. Changing Strings: E- Guitar/Bass
The advice on this page applies to fixed-bridge electric guitars and basses. Some additional information applies to guitars with tremolo units - well examine this later.
Before we cover the procedure in detail, lets look at a few common errors:
- Too much string around the machine head - steel strings are elastic and are constantly affected by various factors including air temperature. The greater the total length of stretched string, the greater the resultant pitch variations.
- Too little string around the machine head - continual slippage will result in poor pitch stability.
- Threading the string the wrong way around the machine head - the string should always be threaded so that turning the machine head counter-clockwise raises the pitch of the string.
- Not pre-stretching the strings - new strings take some time to reach stable tension if not manually stretched (see below).
| Strings should normally be replaced with the same type/gauge - professional truss rod adjustment may be necessary when changing gauge. |
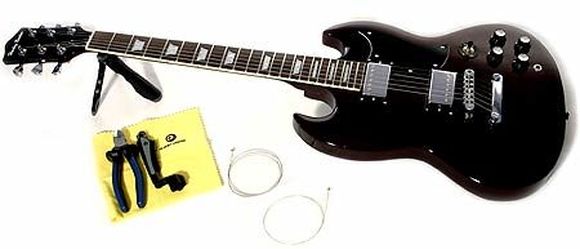
While the only essential tool is a pair of pliers with which to cut the strings, the following equipment will make the process quicker and easier:
- String trimmer - lighter and easier to use than pliers.
- String winder - a miniature crank to speed up string winding, sometimes found combined with a trimmer.
- Polishing/cleaning cloth - removing the strings gives you the opportunity to clean otherwise inaccessible areas.
- Neck support - leaves both hands free for the strings and avoids damage to your guitar.
| NB: paper-scissors or nail-clippers should not be used, as hard steel strings will quickly ruin them! |
Step 1:
Remove the old strings. While removing all six at once is usually fine and makes cleaning easier, if your instrument is at-all unstable or fragile its better to replace one at a time. (This is also a good idea if youre inexperienced as you can check what youre doing by referring to the old strings.)
Step 2:
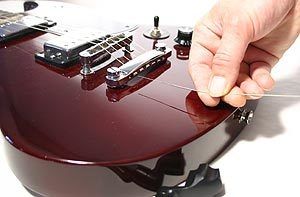
Electric guitar strings have a steel ball or bullet at one end - thread the new string through the bridge, the other end first, so that the ball end is anchored at the bridge. Most Fender-type guitars are threaded from the back of the body, but the principle is otherwise the same.
Step 3:
Thread the string over the bridge saddle and through the corresponding slot in the nut. Some guitars have a string tree (guide) on the headstock - thread the string underneath this if necessary. The best way to avoid any doubt about how this works is to look closely at the path of the old string before you remove it.
Step 4:
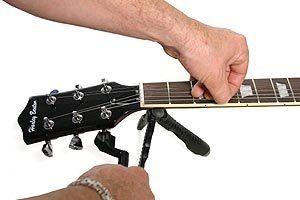
Turn the machine head so that the hole is at right angles to the neck, then thread the string through the hole from the inside to the outside of the headstock. Do not pull the string tight - leave enough slack for four or five turns around the headstock.
Step 5:
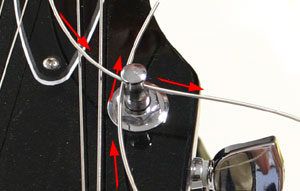
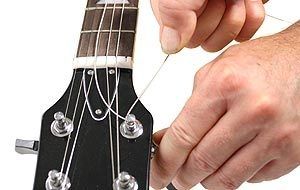
Thread the string around the machine head and under itself, as illustrated. Plain strings may be looped through the hole again before being pulled tight.
Step 6:
Pull the string tightly around the machine head without taking up the slack on the other side, in such a way as to produce a kink in the string and thereby prevent it from slipping. Wind the string around the machine head by turning the tuning peg ClockWise.
Step 7:
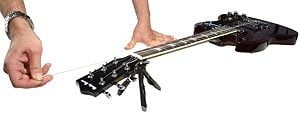
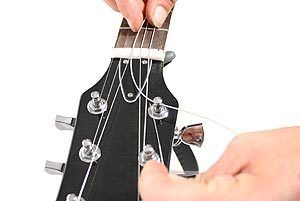
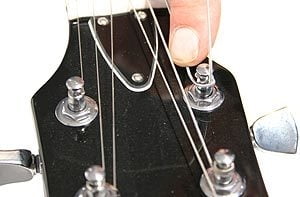
Maintain a slight downward pressure on the string as shown, while winding it tight, aiming for a neat and tight spiral around the machine head.
Step 8:
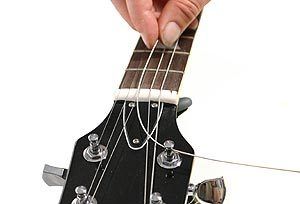
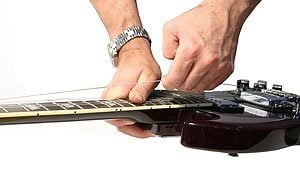
Having tightened the string to somewhere near the correct pitch, tug it lightly upwards a few times - this will greatly speed up the settling-in time. The first tug will probably result in a large drop in pitch - tighten the string and repeat the process until the pitch is stable.
Step 9:
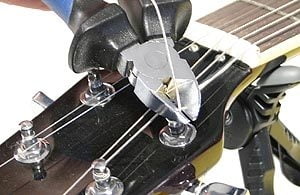
Trim the end of the string close to the machine head and tuck the end downwards to avoid catching fingers/case fabric etc.Now simply repeat the process for each string!

